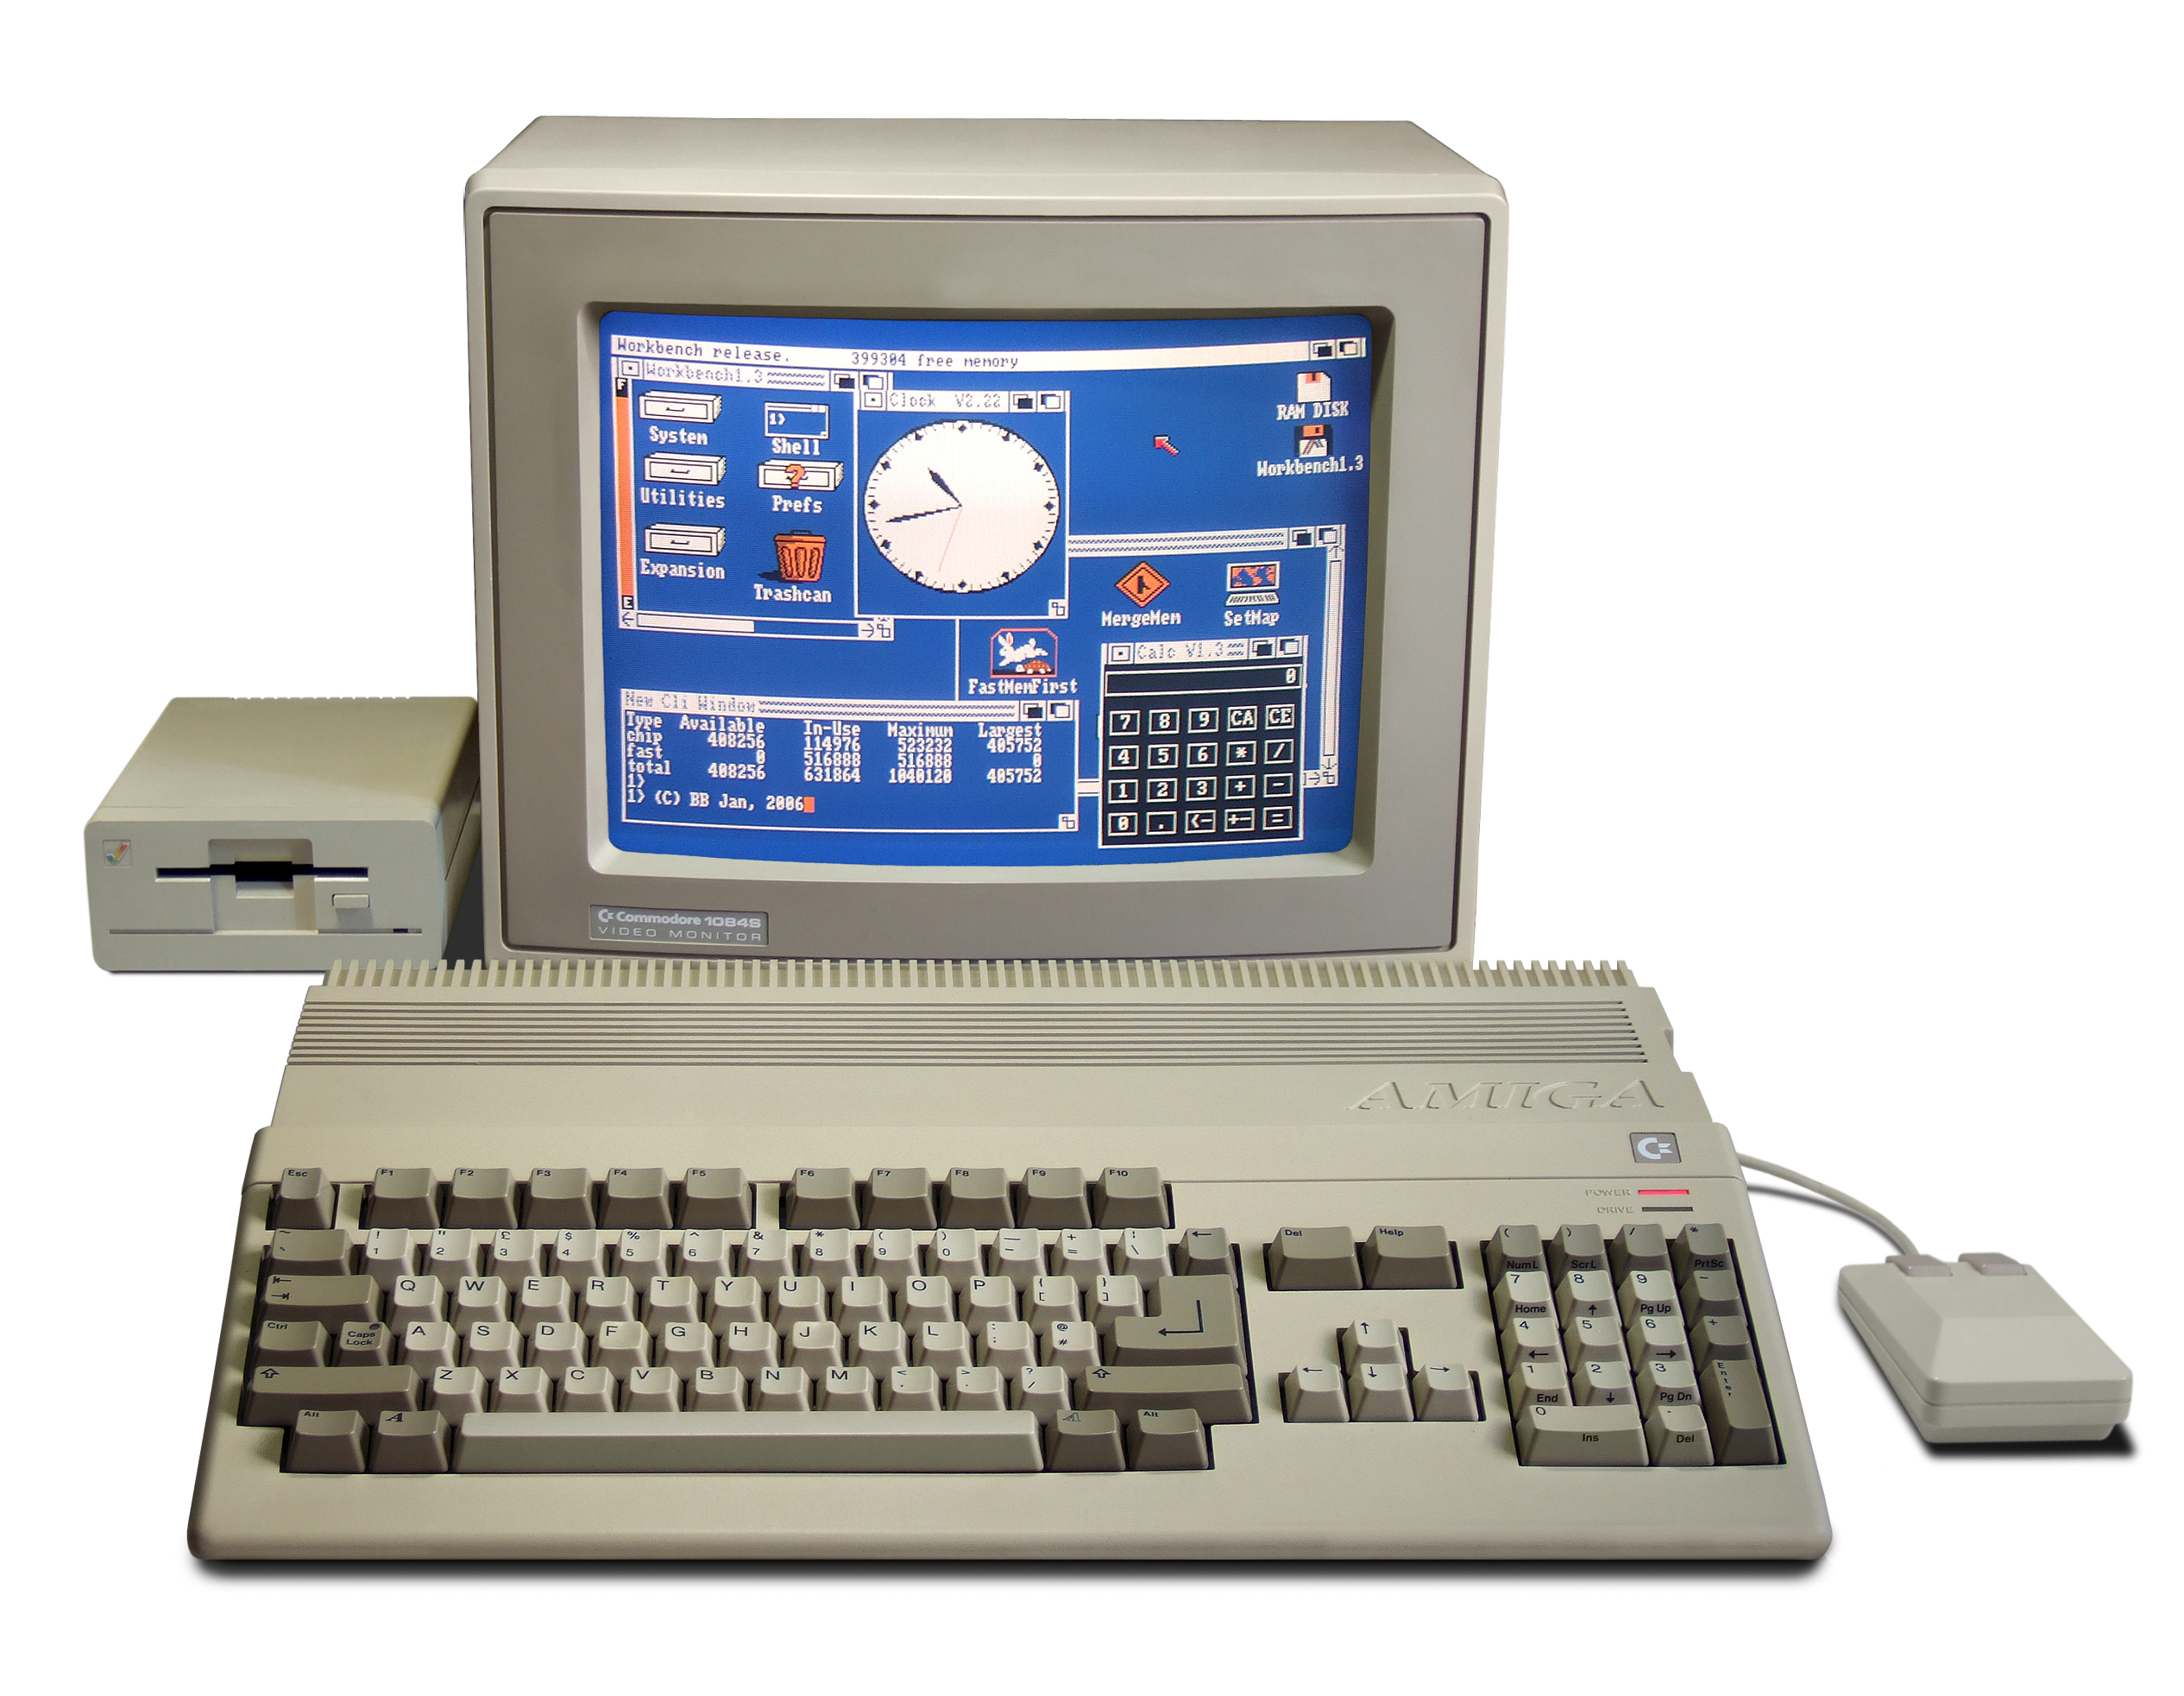
 Niklas Therning's beige plastic god. Has a fast blitter too!
To follow along this blog post with running code, make sure you've installed the prerequisites. Then:
git clone https://github.com/badlogic/r96
cd r96
git checkout 03-blistering-fast-blits
./tools/download-tools.sh
code .
Last time, we drew some horizontal lines and rectangles, and figured out some general optimization approaches. Today, we're going to read files, load images, and draw the images to the screen!
As usual, we'll do some house keeping first.
Adding asset files to the CMake build
Going forward, many of our demos will consist not only of code, but also of asset files, like images. We'll store those assets in a folder called assets/ in the root of the project. The CMake build should then copy the files to the output folder, next to the generated executable.
How do we do this? Similarly to the r96_web_assets task we've already added to copy the .html files.
Here's what needs changing in CMakeLists.txt
add_custom_target(r96_assets
    COMMAND ${CMAKE_COMMAND} -E copy_directory
    ${CMAKE_CURRENT_SOURCE_DIR}/assets
    $<TARGET_FILE_DIR:r96_00_basic_window>/assets
)
We've added a custom target called r96_assets which copies the assets/ folder from the root of the project to the build output folder, next to the executables.
Note: Why not use
${CMAKE_CURRENT_BINARY_DIR}as the directory to copy too? Because when building with MSVC, the executables will end up inbuild/Releaseorbuild/Debug.$<TARGET_FILE_DIR:r96_00_basic_window>is a way to get that directory. With other toolchains, the directory will bebuild/or${CMAKE_CURRENT_BINARY_DIR}. We don't use MSVC, but someone might want to, so let's be nice to them.¯\_(ツ)_/¯
The executable targets also need to depend on the r96_assets tasks, so whenever one or all of them are build, the assets are also copied over.
...
foreach(target IN LISTS targets)
    target_link_libraries(${target} LINK_PUBLIC minifb r96)
    add_dependencies(${target} r96_assets)
    ...
And that's it! We can now place files and folders in assets/ and they'll end up next to our demo executables in the build folder.
Reading files from disk (or URL)
If you've done any file I/O in C previously, you'll likely know where we'll be going: fopen() and friends. That's mostly cross-platform, and we could even use fopen() with Emscripten.
But that comes with a few things I don't want: a virtual filesystem and quite an increase in size of the WASM module. Emscripten will link in a bunch of stuff we won't really need.
We role our own file reading! We want to specify a file path and get a bunch of bytes back. We also want to know how many bytes have been read. And we want to wrap that raw pointer to the memory block that holds the read bytes in a resource type. Let's call that type r96_byte_buffer:
typedef struct r96_byte_buffer {
	uint8_t *bytes;
	size_t num_bytes;
} r96_byte_buffer;
And here's the API to work with r96_byte_buffer instances, following the principles we've established last time:
void r96_byte_buffer_init(r96_byte_buffer *buffer, size_t size);

bool r96_byte_buffer_init_from_file(r96_byte_buffer *buffer, const char *path);

void r96_byte_buffer_dispose(r96_byte_buffer *buffer);
r96_byte_buffer_init() can be used if we want to allocate num_bytes bytes and keep track of both the pointer and the length of the buffer. We dispose r96_byte_buffer instances via, you guessed it, r96_byte_buffer_dispose(). I spare you the implementation details.
The interesting one is r96_byte_buffer_init_from_file(). We need two implementations: one for the desktop and one for the web. Here's the desktop version:
#ifndef __EMSCRIPTEN__
bool r96_byte_buffer_init_from_file(r96_byte_buffer *buffer, const char *path) {
	*buffer = (r96_byte_buffer){0};
	FILE *file = fopen(path, "rb");
	if (!file) return false;

	if (fseek(file, 0, SEEK_END)) goto _error;
	long int num_bytes = ftell(file);
	if (num_bytes == -1) goto _error;
	if (fseek(file, 0, SEEK_SET)) goto _error;

	buffer->num_bytes = num_bytes;
	buffer->bytes = R96_ALLOC_ARRAY(uint8_t, buffer->num_bytes);
	if (fread(buffer->bytes, sizeof(uint8_t), buffer->num_bytes, file) != buffer->num_bytes) goto _error;

	fclose(file);
	return true;

_error:
	fclose(file);
	if (buffer->bytes) R96_FREE(buffer);
	buffer->num_bytes = 0;
	return false;
}
#else
Unceremonious with a creative use of goto. It will do. The real interesting bit is the Emscripten/web implementation, which will be used when __EMSCRIPTEN__ is defined:
#include <emscripten.h>

EM_ASYNC_JS(uint8_t *, load_file, (const char *path, size_t *size), {
	let url = "./" + UTF8ToString(path);
	let response = await fetch(url);
	if (!response.ok) return 0;
	let data = new Uint8Array(await response.arrayBuffer());
	let ptr = _malloc(data.byteLength);
	HEAPU8.set(data, ptr);
	HEAPU32[size >> 2] = data.byteLength;
	return ptr;
})

bool r96_byte_buffer_init_from_file(r96_byte_buffer *buffer, const char *path) {
	buffer->bytes = load_file(path, &buffer->num_bytes);
	return buffer->bytes != NULL;
}
#endif
OK, there's JavaScript code in our C code. We got to be strong now. It's how we can interact with the JavaScript world from our pristine C.
The EM_ASYNC_JS() macro takes a function signature split up into return type, function name, argument list, and the JavaScript implementation of the function. The macro will then generate a sort of trampoline that calls the JavaScript function from within WASM. The arguments are all passed as JavaScript numbers. And return values are numbers too.
The _ASYNC_ part means, that the JavaScript function we define can use JavaScript's await. That will pause execution of the WASM code until the JavaScript function returns.
For our C code, it will look like r96_byte_buffer_init() is blocking. In reality, we hand back control to the browser, which will asynchronously download the data from the url (path).
The implementation itself resolves the passed in pointer path to a JavaScript string. We then throw that at fetch as a URL relative to the URL the WASM module is being run from. fetch() will asynchronously download the content from that URL. We then allocate memory on the WASM heap through _malloc() and copy the downloaded content over. Then we set the number of read bytes to the memory location specified by size and return the pointer. Pretty straight forward!
In the r96_byte_buffer_init_from_file() we just call this JavaScript function, which sets up the r96_byte_buffer based on the data returned from JavaScript. Fancy. Let's load some images.
Loading images
If we had a more masochist streak, we'd now be delving into image file formats and write a custom parser. Luckily for us, someone else has already done all the work, and we'll just stand on those particular giant's shoulders. Sean Barrett has created an impressive set of header-only file libraries, which are easy to use and comparatively small.
stb_image is the go-to solution for light-weight image loading. I've copied the header file to src/r96/, then included it in src/r96.c as per the "installation" instructions:
#define STBI_NO_STDIO
#define STBI_NO_HDR
#define STBI_NO_LINEAR
#define STBI_ONLY_JPEG
#define STBI_ONLY_PNG
#define STB_IMAGE_IMPLEMENTATION
#include "stb_image.h"
The last two lines would actually suffice, but we want our binaries to be as minimal as they can be. I thus disable usage of stdio.h APIs (we have our own file reading API now), HDR, and specify that we only want JPEG and PNG support. Finally, we define STB_IMAGE_IMPLEMENTATION and include the header, which will pull in all the function declarations and their definitions into r96.c. That's it!
And here's how we load image files into r96_image:
bool r96_image_init_from_file(r96_image *image, const char *path) {
	r96_byte_buffer buffer;
	if (!r96_byte_buffer_init_from_file(&buffer, path)) return false;
	image->pixels = (uint32_t *) stbi_load_from_memory(buffer.bytes, (int)buffer.num_bytes, &image->width, &image->height, NULL, 4);
	r96_byte_buffer_dispose(&buffer);
	if (image->pixels == NULL) return false;
	return true;
}
The new-fangled r96_image_init_from_file() takes an r96_image and a file path. We load the file contents via r96_byte_buffer_init_from_file(), then call stbi_load_memory() to decode the encoded image data to raw ARGB pixels, which get stored in the r96_image instance. If the image isn't ARGB, stb_image will helpfully convert it to that format for us.
Demo: Loading images from files
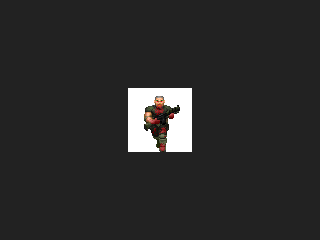
Time for a new demo. I've added our first asset file grunt.png to the assets/ folder. Remember this little guy?

We can't really draw images yet, so we'll write a terminal app called 08_image_file.c that loads the image and spits out its dimensions:
#include <stdio.h>
#include "r96/r96.h"

int main(void) {
	r96_image image;
	if (!r96_image_init_from_file(&image, "assets/grunt.png")) {
		printf("Couldn't load file 'assets/grunt.png'\n");
		return -1;
	}
	printf("Loaded file 'assets/grunt.png', %ix%i pixels\n", image.width, image.height);
	r96_image_dispose(&image);
	return 0;
}
Which, as expected, prints Loaded file 'assets/grunt.png', 64x64 pixels, both on the desktop and the web. Let's check if the pixels we loaded actually look like our little buddy above.
Blitting images
Blitting, which stands for bit block transfer, is an age old computer graphics tradition. It's a stand-in verb for when we want to get pixels from one or more images onto another, possibly involving some boolean operations per pixel.
Systems like the Commodore or Amiga 500 were advertised to feature a dedicated blitting chip, indicating to the gaming afficiandos that that machine will give their games extra punch.
Copy blit
In the simplest case, we copy the pixels of a source image to some location on a destination image, overwriting whatever has been in those destination pixels before the blit.
The source image is copied row by row to the destination image. This is very similar to drawing a rectangle, except that we look up the color for each pixel in each row of the destination rectangle in the source image!
As usual, we also need to think about clipping. The arguments to our blitting function will be the destination image, the source image, and the (x, y) coordinates in the destination image to which the source image should be blitted.
The (x, y) coordinates and the source image width and height define a rectangle in the destination image. We can clip this rectangle just like we clipped single-color rectangles before.
The pixel in the destination rectangle at (x, y) maps to the pixel in the source image at (0, 0), the pixel at (x + 1, y) maps to (1, 0), and so on.
If we clip the destination rectangle, then we'll need to make sure to only copy the corresponding subset of pixels from the source image:
Sounds simple enough, especially since we've already done pretty much everything except copying pixels in r96_rect(). Let's put it into code.
Demo: blitting DOOM guy
I've created a new demo called 09_blit.c. Here it is in all its glory:
#include <MiniFB.h>
#include <stdio.h>
#include "r96/r96.h"
#include <math.h>

void blit(r96_image *dst, r96_image *src, int x, int y) {
	int32_t dst_x1 = x;
	int32_t dst_y1 = y;
	int32_t dst_x2 = x + src->width - 1;
	int32_t dst_y2 = y + src->height - 1;
	int32_t src_x1 = 0;
	int32_t src_y1 = 0;

	if (dst_x1 >= dst->width) return;
	if (dst_x2 < 0) return;
	if (dst_y1 >= dst->height) return;
	if (dst_y2 < 0) return;

	if (dst_x1 < 0) {
		src_x1 -= dst_x1;
		dst_x1 = 0;
	}
	if (dst_y1 < 0) {
		src_y1 -= dst_y1;
		dst_y1 = 0;
	}
	if (dst_x2 >= dst->width) dst_x2 = dst->width - 1;
	if (dst_y2 >= dst->height) dst_y2 = dst->height - 1;

	int32_t clipped_width = dst_x2 - dst_x1 + 1;
	int32_t dst_next_row = dst->width - clipped_width;
	int32_t src_next_row = src->width - clipped_width;
	uint32_t *dst_pixel = dst->pixels + dst_y1 * dst->width + dst_x1;
	uint32_t *src_pixel = src->pixels + src_y1 * src->width + src_x1;
	for (int y = dst_y1; y <= dst_y2; y++) {
		int32_t num_pixels = clipped_width;
		while (num_pixels--) {
			*dst_pixel++ = *src_pixel++;
		}
		dst_pixel += dst_next_row;
		src_pixel += src_next_row;
	}
}

int main(void) {
	r96_image image;
	if (!r96_image_init_from_file(&image, "assets/grunt.png")) {
		printf("Couldn't load file 'assets/grunt.png'\n");
		return -1;
	}

	r96_image output;
	r96_image_init(&output, 320, 240);
	struct mfb_window *window = mfb_open("09_blit", output.width * 3, output.height * 3);

	do {
		r96_clear_with_color(&output, 0xff222222);
		blit(&output, &image, output.width / 2 - image.width / 2, output.height / 2 - image.height / 2);
		if (mfb_update_ex(window, output.pixels, output.width, output.height) < 0) break;
	} while (mfb_wait_sync(window));

	r96_image_dispose(&image);
	r96_image_dispose(&output);
	return 0;
}
Let's get main() out of the way first. We load the grunt.png image, set up an output r96_image to which we render, and which is later drawn to the window via mfb_update_ex(). We create the window and enter the main loop, where we clear the output image, draw the grunt at the center of the output image, and tell minifb to show our output pixels in the window. Not very surprising.
The interesting bits are located in the blit() function. It takes the destination image, the source image, and the location at which we should render the source image in the destination image.
Lines 7-10 then setup the destination rectangle, based on the provided (x, y) coordinates and the source image width and height.
Lines 11-12 define the coordinates from which we'll start fetching pixels from the source image.
Lines 14-17 perform the same trivial rejection test we did in r96_rect(), for when the destination rectangle is entirely outside the destination image.
Lines 19-28 are also copied almost verbatim from r96_rect() and clip the destination rectangle in case it is partially outside the destination image.
Note that if the top left corner of the destination rectangle is outside the top and left bounds of the destination image, we also adjust src_x1 and src_y1, the location from where we start fetching pixels from the source image.
We're done with clipping and proceed to calculate our loop invariants. Those should look familiar too. The only additions compared to r96_rect() are src_next_row and src_pixel, which are analogous to dst_next_row and dst_pixel, except they are used to access and iterate pixels in the source image. We start those off at the potentially clipped src_x1 and src_y1!
The inner loop then iterates over all visible pixels of the destination rectangle, row by row. Instead of setting the destination pixels to a fixed color like in r96_color(), we look up the pixel color in the source image pixel that corresponds to the current destination image pixel.
And here it is in action:
Whoops. Welcome to graphics programming!
Color format conversion
Turns out that stb_image returns pixels in the ABGR format instead of ARGB. Let's fix that in r96_image_init_from_file():
bool r96_image_init_from_file(r96_image *image, const char *path) {
	r96_byte_buffer buffer;
	if (!r96_byte_buffer_init_from_file(&buffer, path)) return false;
	image->pixels = (uint32_t *) stbi_load_from_memory(buffer.bytes, (int)buffer.num_bytes, &image->width, &image->height, NULL, 4);
	r96_byte_buffer_dispose(&buffer);
	if (image->pixels == NULL) return false;

	uint8_t *bytes = (uint8_t *)image->pixels;
	int n = image->width * image->height * sizeof(uint32_t);
	for (int i = 0; i < n; i += 4) {
		uint8_t b = bytes[i];
		bytes[i] = bytes[i + 2];
		bytes[i + 2] = b;
	}
	return true;
}
We swap the r and b component of each pixel and call it a day:
Much better, but not quite perfect yet.
Keyed blit
Little DOOM guy has a bad case of black rectangle background. In the source image, those pixels all have the value 0x00000000. To get rid of those pixels when blitting, we'll need to implement a color keying blitter.
Before we write the source pixel color to the destination pixel, we check if it is equal to a color key we specify. If it is, we leave the destination pixel alone, and move on to the next pixel. That's it!
Demo: color keying DOOM guy
Pretty straight forward, as the next demo called 10_blit_keyed.c shows:
#include <MiniFB.h>
#include <stdio.h>
#include "r96/r96.h"
#include <math.h>

void blit_keyed(r96_image *dst, r96_image *src, int x, int y, uint32_t color_key) {
	int32_t dst_x1 = x;
	int32_t dst_y1 = y;
	int32_t dst_x2 = x + src->width - 1;
	int32_t dst_y2 = y + src->height - 1;
	int32_t src_x1 = 0;
	int32_t src_y1 = 0;

	if (dst_x1 >= dst->width) return;
	if (dst_x2 < 0) return;
	if (dst_y1 >= dst->height) return;
	if (dst_y2 < 0) return;

	if (dst_x1 < 0) {
		src_x1 -= dst_x1;
		dst_x1 = 0;
	}
	if (dst_y1 < 0) {
		src_y1 -= dst_y1;
		dst_y1 = 0;
	}
	if (dst_x2 >= dst->width) dst_x2 = dst->width - 1;
	if (dst_y2 >= dst->height) dst_y2 = dst->height - 1;

	int32_t clipped_width = dst_x2 - dst_x1 + 1;
	int32_t dst_next_row = dst->width - clipped_width;
	int32_t src_next_row = src->width - clipped_width;
	uint32_t *dst_pixel = dst->pixels + dst_y1 * dst->width + dst_x1;
	uint32_t *src_pixel = src->pixels + src_y1 * src->width + src_x1;
	for (int y = dst_y1; y <= dst_y2; y++) {
		int32_t num_pixels = clipped_width;
		while (num_pixels--) {
			uint32_t color = *src_pixel;
			src_pixel++;
			if (color == color_key) {
				dst_pixel++;
				continue;
			}
			*dst_pixel++ = color;
		}
		dst_pixel += dst_next_row;
		src_pixel += src_next_row;
	}
}

int main(void) {
	r96_image image;
	if (!r96_image_init_from_file(&image, "assets/grunt.png")) {
		printf("Couldn't load file 'assets/grunt.png'\n");
		return -1;
	}

	r96_image output;
	r96_image_init(&output, 320, 240);
	struct mfb_window *window = mfb_open("10_blit_keyed", output.width * 3, output.height * 3);

	do {
		r96_clear_with_color(&output, 0xff222222);
		blit_keyed(&output, &image, output.width / 2 - image.width / 2, output.height / 2 - image.height / 2, 0x00000000);
		if (mfb_update_ex(window, output.pixels, output.width, output.height) < 0) break;
	} while (mfb_wait_sync(window));

	r96_image_dispose(&image);
	r96_image_dispose(&output);
	return 0;
}
The code is exactly the same, except for lines 40-43, where we snuck in a little if statement that ensures we skip pixels that match the color_key. The color key is specified as a parameter to blit_keyed() in line 64. That's it!
Now DOOM guy is free from the shackles of his black rectangle background.
Demo: shoddy blitting micro benchmark
How fast are our blitting functions? We can use r96_rect() as a base-line. It performs all the same operations, except the look-up of the pixel color in the source image. We can consider it our idealized best case scenario. Here's demo 11_blit_perf.c which implements a shoddy micro benchmark.
#include <MiniFB.h>
#include <stdio.h>
#include "MiniFB_enums.h"
#include "r96/r96.h"
#include <math.h>
#include <string.h>

void blit(r96_image *dst, r96_image *src, int x, int y) {
	// ... as above
}

void blit_keyed(r96_image *dst, r96_image *src, int x, int y, uint32_t color_key) {
	// ... as above
}

int main(void) {
	r96_image image;
	if (!r96_image_init_from_file(&image, "assets/grunt.png")) {
		printf("Couldn't load file 'assets/grunt.png'\n");
		return -1;
	}

	r96_image output;
	r96_image_init(&output, 320, 240);
	struct mfb_window *window = mfb_open("11_blit_perf", output.width * 3, output.height * 3);
	struct mfb_timer *timer = mfb_timer_create();
	do {
		r96_clear_with_color(&output, 0xff222222);

		srand(0);
		mfb_timer_reset(timer);
		for (int i = 0; i < 20000; i++) {
			r96_rect(&output, rand() % output.width, rand() % output.height, 64, 64, 0xffffffff);
		}
		printf("rect()       %f\n", mfb_timer_delta(timer));

		srand(0);
		mfb_timer_reset(timer);
		for (int i = 0; i < 20000; i++) {
			blit(&output, &image, rand() % output.width, rand() % output.height);
		}
		printf("blit()       %f\n", mfb_timer_delta(timer));

		srand(0);
		mfb_timer_reset(timer);
		for (int i = 0; i < 20000; i++) {
			blit_keyed(&output, &image, rand() % output.width, rand() % output.height, 0x0);
		}
		printf("blit_keyed() %f\n", mfb_timer_delta(timer));

		if (mfb_update_ex(window, output.pixels, output.width, output.height) < 0) break;
	} while (mfb_wait_sync(window));

	mfb_timer_destroy(timer);
	r96_image_dispose(&image);
	r96_image_dispose(&output);
	return 0;
}
I've omitted the implementations of blit() and blit_keyed() above for brevity's sake.
The benchmark code in main() times drawing 20000 rectangles, 20000 DOOM grunts without color keying, and 20000 DOOM grunts with color keying. Each rectangle has a fixed size of 64x64 pixels, the same size as the DOOM grunt image, to make the comparison somewhat fairer. We also re-initialize the seed for rand() via srand(0) before each timing loop, so they each draw to the exact same destination rectangles.
Here's what I get on macOS with Clang version 14.0.0 that ships with the latest Xcode:
rect()       0.005832
blit()       0.006717
blit_keyed() 0.013974
rect()       0.005910
blit()       0.006602
blit_keyed() 0.014015
rect()       0.005946
blit()       0.006691
blit_keyed() 0.014020
r96_rect() and blit() are pretty close performance-wise. However, blit_keyed() is twice as slow as either of these. That's not great. Let's investigate.
Hey dude, where's my auto-vectorization?
Here are just the (inner) loops of r96_rect(), blit(), and blit_keyed() for comparison:
// r96_rect()
for (int y = y1; y <= y2; y++) {
    int32_t num_pixels = clipped_width;
    while (num_pixels--) {
        *pixel++ = color;
    }
    pixel += next_row;
}

// blit()
for (int y = dst_y1; y <= dst_y2; y++) {
    int32_t num_pixels = clipped_width;
    while (num_pixels--) {
        *dst_pixel++ = *src_pixel++;
    }
    dst_pixel += dst_next_row;
    src_pixel += src_next_row;
}

// blit_keyed()
for (int y = dst_y1; y <= dst_y2; y++) {
    int32_t num_pixels = clipped_width;
    while (num_pixels--) {
        uint32_t color = *src_pixel;
        src_pixel++;
        if (color == color_key) {
            dst_pixel++;
            continue;
        }
        *dst_pixel++ = color;
    }
    dst_pixel += dst_next_row;
    src_pixel += src_next_row;
}
blit() does a little more work in the inner loop by fetching the source image pixel color, but is otherwise equivalent to r96_rect(). The minor slow-down can be explained by that additional work. Thankfully the impact isn't huge, most likely due to good caching of the source image pixels in the L1 cache of the CPU.
blit_keyed(), on the other hand, does quite a bit more work. It's also a bit convoluted. Let's clean it up. I created a copy of blit_keyed() in 11_blit_perf.c called blit_keyed_opt1(), and replaced the loop with this:
for (int y = dst_y1; y <= dst_y2; y++) {
    int32_t num_pixels = clipped_width;
    while (num_pixels--) {
        uint32_t color = *src_pixel;
        if (color != color_key) {
            *dst_pixel = color;
        }
        src_pixel++;
        dst_pixel++;
    }
    dst_pixel += dst_next_row;
    src_pixel += src_next_row;
}
I then added a new timing loop in main() in 11_blit_perf.c. Here are the new results:
rect()            0.005780
blit()            0.006572
blit_keyed()      0.013927
blit_keyed_opt1() 0.013758
rect()            0.005887
blit()            0.006622
blit_keyed()      0.013951
blit_keyed_opt1() 0.013832
rect()            0.005892
blit()            0.006708
blit_keyed()      0.013938
blit_keyed_opt1() 0.013739
That didn't change anything. Since our blit_keyed_opt1() loop is as simple as it can get, it's time to look at the generated assembly.
Starring at assembly control flow graphs
This time however, we'll start by looking at the control flow graph of the generated assembly. That's a bit easier to follow than the linear listing we get from Godbolt Compiler Explorer.
Here's the loop in r96_rect() as a CFG, courtesy of my asmcfg library:
At first glance, we see the big fat block of movdqu instructions standing out.
If you see that generated for one of your memory moving loops, then you can be pretty sure the compiler has managed to vectorize large parts of your loop with SIMD instructions. This is know as auto-vectorization and we always want that for our loops, if possible.
The movdqu instruction moves the 16-bytes stored in a 128-bit SSE register like xmm0 into an unaligned memory location. In this case, unaligned means the memory address is not a multiple of 16.
For r96_rect(), the compiler generated code to fill the 16-bytes of the xmm0 register with 4 copies of the rectangle's color (which happened before the loop pictured above). Every movdqu we see then writes that color to 4 pixels in the destination image in one step.
There are actually multiple blocks using movdqu in the loop. Which one is used depends on how many pixels need to still be written to in a row.
The big one with label LBB0_14 and 8 movdqu instructions is for the case where at least 128 bytes (or 32 pixels) are still to be written.
The smaller block with label LBB0_17 and two movdqu instructions is used when at least 32-bytes (or 8 pixels) are still to be written.
For the case that less than 32-bytes still need to be written, the block with label LBB0_20 is used. This one writes 4 bytes (or 1 pixel) at a time via the mov instruction.
That's pretty good, albeit not optimal. We could rewrite this manually in assembly or use intrinsics to ensure we can use movdqa for aligned memory writes, which will generally yield better throughput.
However, as we don't want to drop down to assembly or use CPU architecture specific intrinsics, we'll consider this to be good enough.
Here's what the CFG of the blit() loop looks like.
If you squint hard enough, you can see blocks of movups instructions. That instruction is misappropriated by the compiler to move 4 pixel colors read from the source image to the destination image at once, despite the fact that the pixel colors are uint32_t and not single-precision floats. Since we don't do any arithmetic on the values, this is fine.
As in the r96_rect() case, the compiler generated a bunch of specialized control flows, depending on how many pixels in a row are left to be written. The additional work of having to read the source pixels complicates the control flow considerably. However, the principle remains the same.
The compiler managed to auto-vectorize the inner loop of blit(), yielding performance that's in the same ball park as the equally auto-vectorized r96_rect(). Not bad!
So what does our twice as slow blit_keyed_opt1() look like?
That's not great. The graph is so complex, I had to leave in the clipping code so the CFG generator didn't throw up. We don't even have to dig deeply into this to see the issue. The compiler generated two big branches.
One doesn't use any SIMD instructions, while the other one tries its hardest to use SIMD but devolves into a ball of conditional jumps.
That alone will kill any performance gained from using SIMD to read/write more than 1 pixel at once.
Clearly, Clang can't deal with this simple if conditional in the inner loop. What about other compilers? And how can we make them generate passable vectorized code?
Asking the compiler why auto-vectorization goes wrong
Time to switch to the Godbolt compiler explorer. I've pasted in r96_rect(), blit(), and blit_keyed_opt1() from above, plus the r96_image struct. I then set up Clang x86_64 and MSVC x86_64 with compiler flags that will make the compiler tell us what they vectorized, what they couldn't vectorize, and why.
The flags to get auto-vectorization reports for Clang are:
-O3 -Rpass=loop-vectorize -Rpass-missed=loop-vectorize -Rpass-analysis=loop-vectorize -gline-tables-only -gcolumn-info
The flags for MSVC are:
/O2 /Qvec-report:2
Open this Godbolt "project" to follow along.
Clang tells us this:
// r96_rect()
example.c:31:3: remark: vectorized loop (vectorization width: 4, interleaved count: 2) [-Rpass=loop-vectorize]
                while (num_pixels--) {
                ^

// blit()
example.c:69:3: remark: vectorized loop (vectorization width: 4, interleaved count: 2) [-Rpass=loop-vectorize]
                while (num_pixels--) {
                ^

// blit_keyed_opt1()
example.c:153:3: remark: vectorized loop (vectorization width: 4, interleaved count: 2) [-Rpass=loop-vectorize]
                while (num_pixels--) {
                ^
Lier, lier, pants on fire! OK, it DID vectorize blit_keyed_opt1(), but the vectorization doesn't have any positive effect on performance.
MSVC is interesting too.
--- Analyzing function: r96_rect
<source>(31) : info C5002: loop not vectorized due to reason '1301'
<source>(29) : info C5002: loop not vectorized due to reason '1106'

--- Analyzing function: blit_keyed_opt1
<source>(108) : info C5002: loop not vectorized due to reason '1301'
<source>(106) : info C5002: loop not vectorized due to reason '1106'

--- Analyzing function: blit
<source>(69) : info C5002: loop not vectorized due to reason '1301'
<source>(67) : info C5002: loop not vectorized due to reason '1106'
Thank you, MSVC, I LOVE having to look up error and reason codes on the interweb instead of having you tell me directly what's up.
MSVC didn't manage to vectorize any of the loops. The reasons given can be found here. I have reproduced them below, because I'm way more user friendly than MSVC.
- 1106: outer loop not vectorized.
- 1301: loop stride isn't +1.
We can ignore 1106. It seems that MSVC can not deal with while(num_pixels--).
Fulfilling MSVC +1 loop stride requirement
We can fix that by replacing
int32_t num_pixels = clipped_width;
while (num_pixels--) {
with
for (int i = 0; i < clipped_width; i++) {
Note: If you wondered why I went with
while(num_pixels--)in the first place: I've intentionally written the loop like this, so MSVC would throw up. No, really.
I've fixed this up in r96_rect() and blit(), and made a copy of blit_keyed_opt1() called blit_keyed_opt2() which also has the fix. I then added a new timing loop for blit_keyed_opt2() to main(). Let's see if this helps Clang generate better performing auto-vectorized loops:
rect()            0.005757
blit()            0.006615
blit_keyed()      0.014153
blit_keyed_opt1() 0.013896
blit_keyed_opt2() 0.014292
rect()            0.005766
blit()            0.006537
blit_keyed()      0.014316
blit_keyed_opt1() 0.014213
blit_keyed_opt2() 0.014659
rect()            0.005904
blit()            0.006693
blit_keyed()      0.014274
blit_keyed_opt1() 0.014215
blit_keyed_opt2() 0.014698
Welp, that didn't make any impact with Clang in terms of performance. We still get the "bad" vectorization in blit_keyed_opt2().
Checking the updated Godbolt "project", we can see that MSVC is now a bit happier, but not much.
--- Analyzing function: r96_rect
<source>(29) : info C5002: loop not vectorized due to reason '1106'

--- Analyzing function: blit
<source>(67) : info C5002: loop not vectorized due to reason '1300'
<source>(66) : info C5002: loop not vectorized due to reason '1106'

--- Analyzing function: blit_keyed_opt2
<source>(105) : info C5002: loop not vectorized due to reason '1100'
<source>(104) : info C5002: loop not vectorized due to reason '1106'
Compiler returned: 0
It managed to vectorize the inner loop of r96_rect() given our change. Though vectorization is a bit of a strong claim. It actually uses rep stosd, an instruction as old as I am. In the year of our Thread Ripper Lord 2022, MSVC has many actually vectorized instructions at its disposal, but fails to use them here for some reason.
MSVC also still fails to vectorizer the inner loops of blit() (reason 1300) and blit_keyed_opt2() (reason 1100):
- 1300: Loop body contains little or no computation.
- 1100: Loop contains control flow—for example, "if" or "?:".
To 1300 for blit()'s inner-loop I say: are you kidding me, MSVC?! Clang thinks blit() has a vectorization worthy inner loop, and the benchmark data indicates that it's right. MSVC just throws its hands up in the air and refuses to vectorize the loop. Lazy compiler bad!
The 1100 indicates, that the MSVC auto-vectorizer is not very good, given that the conditional could be easily translated to a masking SIMD operation (also known as if-conversion).
But Clang also fails to do that properly. Both compilers should feel bad. Especially Clang, since it claims it can auto-vectorize any conditional through its fancy if-conversion optimizer pass.
I mean, it does auto-vectorize conditionals. It just does it badly.
Throwing "engineering" at the wall
Where to go from here?
Like any self-respecting engineer, we're going to blindly throw some best guesses at the wall. But only after we've read A Guide to Vectorization with Intel C++ Compilers.
While this is supposed to apply to Intel's compiler, some of the take-aways surely apply to the auto-vectorizers of MSVC, Clang, and GCC as well. These compilers sadly don't have great documentation on how to make their auto-vectorizers happy.
Let's start by making a copy of blit_keyed_opt2() called blit_keyed_opt3(), and add a timing loop to main() in 11_blit_perf.c. We change the loop in blit_keyed_opt3() to this:
for (int y = dst_y1; y <= dst_y2; y++) {
    for (int i = 0; i < clipped_width; i++) {
        uint32_t color = src_pixel[i];
        if (color != color_key) {
            dst_pixel[i] = color;
        }
    }
    dst_pixel += dst_next_row + clipped_width;
    src_pixel += src_next_row + clipped_width;
}
Maybe using indexing helps?
Here are the micro-benchmark results using Clang:
rect()            0.005971
blit()            0.006769
blit_keyed()      0.014510
blit_keyed_opt1() 0.014074
blit_keyed_opt2() 0.014133
blit_keyed_opt3() 0.014629
rect()            0.005901
blit()            0.006527
blit_keyed()      0.014326
blit_keyed_opt1() 0.014038
blit_keyed_opt2() 0.014092
blit_keyed_opt3() 0.014609
rect()            0.005847
blit()            0.006499
blit_keyed()      0.014212
blit_keyed_opt1() 0.014082
blit_keyed_opt2() 0.014100
blit_keyed_opt3() 0.014660
No change in performance with Clang. On the Godbolt site, Clang still claims everything is awesome regarding vectorization. MSVC is still unable to vectorize the loop, which makes sense, as we didn't kill the if statement.
Let's guess some more! blit_keyed_opt4() has this loop:
for (int y = dst_y1; y <= dst_y2; y++) {
    for (int i = 0; i < clipped_width; i++) {
        uint32_t src_color = *src_pixel;
        uint32_t dst_color = *dst_pixel;
        *dst_pixel = src_color != color_key ? src_color : dst_color;
        src_pixel++;
        dst_pixel++;
    }
    dst_pixel += dst_next_row;
    src_pixel += src_next_row;
}
The idea behind this is that the tenary ?: operator can be reduced to a mathematical expression instead of a conditional jump. That should allow the vectorizer to do its job. Yes, it will fetch a pixel from the destination image, but that will also be in the cache in all likely-hood.
Here are the micro-benchmark results using Clang:
rect()            0.006127
blit()            0.006699
blit_keyed()      0.014528
blit_keyed_opt1() 0.014335
blit_keyed_opt2() 0.014485
blit_keyed_opt3() 0.014895
blit_keyed_opt4() 0.008150
rect()            0.006011
blit()            0.006728
blit_keyed()      0.014591
blit_keyed_opt1() 0.014346
blit_keyed_opt2() 0.014278
blit_keyed_opt3() 0.014840
blit_keyed_opt4() 0.008113
rect()            0.005955
blit()            0.006719
blit_keyed()      0.014357
blit_keyed_opt1() 0.014152
blit_keyed_opt2() 0.014221
blit_keyed_opt3() 0.014668
blit_keyed_opt4() 0.008134
Holy cow, that did it for Clang! What does the vectorization report from MSVC say? See for yourself in Godbolt Compiler Explorer
--- Analyzing function: blit_keyed_opt1
<source>(152) : info C5002: loop not vectorized due to reason '1301'
<source>(150) : info C5002: loop not vectorized due to reason '1106'

--- Analyzing function: r96_rect
<source>(29) : info C5002: loop not vectorized due to reason '1106'

--- Analyzing function: blit
<source>(68) : info C5002: loop not vectorized due to reason '1300'
<source>(67) : info C5002: loop not vectorized due to reason '1106'

--- Analyzing function: blit_keyed
<source>(107) : info C5002: loop not vectorized due to reason '1301'
<source>(105) : info C5002: loop not vectorized due to reason '1106'

--- Analyzing function: blit_keyed_opt2
<source>(195) : info C5002: loop not vectorized due to reason '1100'
<source>(194) : info C5002: loop not vectorized due to reason '1106'

--- Analyzing function: blit_keyed_opt3
<source>(238) : info C5002: loop not vectorized due to reason '1100'
<source>(237) : info C5002: loop not vectorized due to reason '1106'

--- Analyzing function: blit_keyed_opt4
<source>(279) : info C5001: loop vectorized
<source>(278) : info C5002: loop not vectorized due to reason '1106'
Hallelujah, it vectorized the inner loop of blit_keyed_opt4(). The inner loop of blit() is still not vectorized (we didn't change it). How bad is that? Let's run the micro-benchmark on Windows with MSVC:
rect()                  0.023023
blit()                  0.038542
blit_keyed()            0.051895
blit_keyed_opt1()       0.048662
blit_keyed_opt2()       0.048759
blit_keyed_opt3()       0.056734
blit_keyed_opt4()       0.012353
rect()                  0.023163
blit()                  0.037512
blit_keyed()            0.050863
blit_keyed_opt1()       0.050506
blit_keyed_opt2()       0.049140
blit_keyed_opt3()       0.057044
blit_keyed_opt4()       0.012292
rect()                  0.023217
blit()                  0.037487
blit_keyed()            0.050150
blit_keyed_opt1()       0.050790
blit_keyed_opt2()       0.048245
blit_keyed_opt3()       0.056707
blit_keyed_opt4()       0.012285
MSVC is really, really special... Now blit_keyed_opt4() is faster than r96_rect() and blit(), even though on paper it does a ton more work.
I guess when MSVC vectorizes, it vectorizes real good. In absolute wall clock time, the code runs slower on my super beefy x86_64 DOOM slayer Windows machine than on my ARM64 M1 Max MacBook Pro. But such is life.
Both r96_rect() and blit() have trivial loops, which MSVC should be able to optimize. Especially in case of r96_rect(), where there can not be any aliasing between destination and source. Alas, it seems this is a known issue.
What about WebAssembly? We don't have any SIMD support there (yet).
rect()                  0.021600
blit()                  0.038100
blit_keyed()            0.050900
blit_keyed_opt1()       0.055500
blit_keyed_opt2()       0.063100
blit_keyed_opt3()       0.063400
blit_keyed_opt4()       0.069900
rect()                  0.021700
blit()                  0.037800
blit_keyed()            0.050800
blit_keyed_opt1()       0.055400
blit_keyed_opt2()       0.063600
blit_keyed_opt3()       0.064200
blit_keyed_opt4()       0.069400
rect()                  0.021300
blit()                  0.036700
blit_keyed()            0.050500
blit_keyed_opt1()       0.056100
blit_keyed_opt2()       0.063400
blit_keyed_opt3()       0.063500
blit_keyed_opt4()       0.070600
blit_keyed_opt4() now loses out against the other variants. We could #ifdef our way out of this and use the best performing version on each platform.
For maintainability's sake, we won't do that though.
*Note:
blit()andblit_keyed_opt4()have been promoted tor96library functions and shall henceforth be known asr96_blit()andr96_blit_keyed().
Next up
What a journey! It feels like we solved a murder mystery, where MSVC is the murderer. And while we solved one mystery, the mystery of MSVC not being able to vectorize r96_rect() nor blit() remains. As we use Clang on Windows, we don't care much about MSVC though.
Next time, we'll keep things short, I promise! We'll be looking into bitmap fonts, so we no longer need to print to the console.