 Cool kids draw their rectangles themselves.
To follow along this blog post with running code, make sure you've installed the prerequisites. Then:
git clone https://github.com/badlogic/r96
cd r96
git checkout 02-dont-be-square
./tools/download-tools.sh
code .
Last time, we set up our development environment and explored concepts like pixels, colors, and rasters. Today, we're going to figure out how to draw rectangles. Exciting!
But first, we'll do some housekeeping.
Putting more stuff into r96.h/r96.c
Let's stuff a few things into src/r96/r96.h and src/r96/r96.h, where re-usable code used by the demo apps lives.
Destructuring colors
Creating colors from alpha, red, green, and blue components is done via R96_ARGB(). Sometimes we want to do the reverse and extract individual color components:
#define R96_A(color) ((uint8_t) (color >> 24))
#define R96_R(color) ((uint8_t) (color >> 16))
#define R96_G(color) ((uint8_t) (color >> 8))
#define R96_B(color) ((uint8_t) (color))
Which can be used like this:
uint32_t color = R96_ARGB(255, 128, 38, 4);
uint8_t alpha = R96_A(color); // 255
uint8_t red = R96_R(color);   // 128
uint8_t green = R96_G(color); // 38
uint8_t blue = R96_B(color);  // 4
Stellar memory management
Remember this line from the previous demo apps?
uint32_t *pixels = (uint32_t *) malloc(sizeof(uint32_t) * res_x * res_y);Direct call to malloc(), sizeof(), casting, yuck! Let's wrap allocation in a few simple macros:
#define R96_ALLOC(type) (type *) malloc(sizeof(type))
#define R96_ALLOC_ARRAY(type, numElements) (type *) malloc(sizeof(type) * numElements)
#define R96_FREE(ptr) free(ptr)
R96_ALLOC(type) allocates one instance of type. R96_ALLOC_ARRAY(type, numElements) allocates numElements sequential instances. To clean-up, we call R96_FREE(ptr). E.g.:
typedef struct rectangle {
	float x, y, width, height;
} rectangle;

rectangle *rect = R9_ALLOC(rectangle);
R96_FREE(rect);
uint32_t *pixels = R9_ALLOC_ARRAY(uint32_t, 320 * 240);
R96_FREE(pixels);
Apart from a little less typing, these macros let us replace our allocator, should we want that down the road.
A struct for (raster) images
Keeping track of the width, height, and pixels of rasters is annoying, as we saw in the previous demo apps. The term "raster" is also a bit too "scientific". Colloquially, what we are dealing with are images.
Note: if we wanted to be super precise, we'd have to say "raster images". Images can also be represented in other ways, e.g. as a list of shapes with color information, aka vector images. In this series however, we'll only deal with raster images. Raster, raster image, and image are all synonymous throughout the series.
Here's a struct to ease the pain:
typedef struct r96_image {
	int32_t width, height;
	uint32_t *pixels;
} r96_image;
Many of the algorithms we'll build work using signed integers. We thus store width and height as signed integers to avoid some casting.
We add an initializer function that sets width and height and allocates memory for the pixels:
void r96_image_init(r96_image *image, int32_t width, int32_t height) {
	assert(width > 0);
	assert(height > 0);

	image->width = width;
	image->height = height;
	image->pixels = R96_ALLOC_ARRAY(uint32_t, width * height);
}
The heap-allocated memory also needs to be freed at some point, so we add a disposal function:
void r96_image_dispose(r96_image *image) {
	R96_FREE(image->pixels);
}
Creating raster images has never been easier:
r96_raster raster;
r96_raster_init(&raster, 320, 240);
r96_raster_dispose(&raster);

r96_raster *heapRaster = R96_ALLOC(r96_raster);
r96_raster_init(heapRaster, 64, 64);
r96_raster_dispose(heapRaster);
R96_FREE(heapRaster);
As illustrated by the snippet above, we can initialize and dispose both stack and heap allocated r96_image instances. Which leads me into a little excursion on memory and resource life-time management.
A word on memory and resource life-time management
In C, we don't have the luxury of a borrow checker like in Rust, or a garbage collector like in Java. We don't even have RAII, like in C++. Heap allocated memory blocks and other resources, like file handles, must be carefully managed.
C doesn't really give us the tools to build water-tight resources management. Instead, we must come up with rules, that make it less likely that we'll shoot ourselves in the foot. From these rules we derive an API design which should help enforce the rules.
Our 4 rules are:
- There are no naked resources (e.g. a pointer to heap allocated memory)
- A resource is owned by a single instance of a resource-owning type (e.g. heap memory storing pixels is owned by a single
r96_imageinstance) - Prefer stack allocation over heap allocation
- Prefer value types over reference types
While we won't go for a full "handles instead of pointers" system, we'll try to make our code as pointer- and allocation-free as possible.
How does this translate to the r96 API?
- Resource-owning types are initialized and disposed with corresponding initializer and disposal functions, e.g.
r96_image,r96_image_init(), andr96_image_dispose() - Resource-owning types are always passed and returned by reference
- Non-resource-owning types are initialized with C99 designated initializers
- Non-resource-owning types are passed to and returned from functions by value, unless performance considerations make it prohibitive
The first two rules make it less likely that two instances of a resource-owning type point to the same resource. The initialization and disposal functions give us a single location where a resource of a specific type is acquired and released, which helps with debugging.
The latter two rules make it more likely that we store much of our data on the stack instead of the heap (or as value types instead of reference types). Stack allocation is faster, and we don't need to remember to free anything if a stack allocated thing goes out of scope.
We'll try to stick with this until everything falls apart.
Reading and writing pixels, the safe way
Previously, we've calculated pixel addresses manually. Let's wrap that functionality up in functions for setting and getting pixel colors on and from an r96_image:
void r96_set_pixel(r96_image *image, int32_t x, int32_t y, uint32_t color) {
	if (x < 0 || x >= image->width || y < 0 || y >= image->height) return;
	image->pixels[x + y * image->width] = color;
}

uint32_t r96_get_pixel(r96_image *image, int32_t x, int32_t y) {
	if (x < 0 || x >= image->width || y < 0 || y >= image->height) return 0;
	return image->pixels[x + y * image->width];
}
Neither r96_set_pixel() nor r96_get_pixel() can assume that coordinates given to them are within the image bounds. We thus ensure that's the case. This is a form of clipping. Clipping will be a permanent, very annoying companion of ours throughout this journey.
Note: the largest x-coordinate that's still within the bounds of the image is
width - 1, the largest y-coordinate isheight - 1. Missing that-1is a regular source of errors.
These functions are slower than manually calculating a pixel address, as they do more work. They'll still come in handy when we implement naive versions of more complex rendering algorithms. Once the naive implementation is working, we usually replace calls to these functions with inlined versions, such that we avoid per pixel clipping and possibly the multiplication in the address calculation.
Demo app: drawing pixels, again
Our new fancy API is put to use in the demo app 02_image.c.
#include <MiniFB.h>
#include <stdio.h>
#include "r96/r96.h"

int main(void) {
	r96_image image;
	r96_image_init(&image, 320, 240);
	struct mfb_window *window = mfb_open("02_image", image.width * 2, image.height * 2);
	do {
		for (int i = 0; i < 200; i++) {
			int32_t x = rand() % image.width;
			int32_t y = rand() % image.height;
			uint32_t color = R96_ARGB(255, rand() % 255, rand() % 255, rand() % 255);
			r96_set_pixel(&image, x, y, color);
		}

		if (mfb_get_mouse_button_buffer(window)[MOUSE_BTN_1]) {
			int32_t mouse_x = mfb_get_mouse_x(window);
			int32_t mouse_y = mfb_get_mouse_y(window);
			uint32_t color = r96_get_pixel(&image, mouse_x, mouse_y);
			printf("(%i, %i) = { alpha: %i, red: %i, green: %i, blue: %i }\n", mouse_x, mouse_y, R96_A(color), R96_R(color), R96_G(color), R96_B(color));
		}

		mfb_update_ex(window, image.pixels, image.width, image.height);
	} while (mfb_wait_sync(window));
	r96_image_dispose(&image);
	return 0;
}
In lines 6-7, we create a new r96_image instance and initialize it to have 320x240 pixels. We then create a window with twice the size of our image. MiniFB will scale our 320x240 pixels image up to the 640x480 window size in mfb_update_ex(). This way, it's easier to see what's going on.
The pixel rendering in line 14 now uses r96_set_pixel() instead of manually calculating the pixel address.
To exercise the new r96_get_pixel() function and the color component macros, we print the current color at the mouse position if the left mouse button is pressed (lines 17-22).
Finally, we dispose of the image in line 26.
Have a look at 02_image.html to see the magic that gets the printf() output into the div below the canvas.
Clearing an image
In real-time graphics, we often clear the "screen" before we render a new frame. So far, we didn't have a need for this age old tradition, but we'll likely need it in the future.
In our case, the "screen" is the r96_image we draw our pixels to, which we later pass to mfb_update_ex() to have it displayed in a window.
Here are two functions to clear a r96_image with a specific color.
void r96_clear(r96_image *image) {
	memset(image->pixels, 0x0, image->width * image->height * sizeof(uint32_t));
}

void r96_clear_with_color(r96_image *image, uint32_t color) {
	uint32_t *pixels = image->pixels;
	for (int i = 0; i < image->width * image->height; i++)
		pixels[i] = color;
}
r96_clear() covers the common case of setting all pixels of an image to black. It uses memset(), which is heavily optimized and usually beats a hand-rolled loop.
r96_clear_with_color() lets us clear with an arbitrary color. As we loop through pixels individually, it will likely be quite a bit slower than the memset() based alternative above.
But how much slower?
Demo app: profiling and optimizing r96_clear_with_color()
While you can make some assumption about the performance of your code just by looking at it, you must always measure to ensure your assumptions hold. Profiling code is an art in itself, especially as your code becomes more complex.
Luckily, profiling r96_clear() and r96_clear_with_color() is comparatively trivial. All we need is a way to measure how much time has passed. MiniFB provides a high precision timer we can use for that purpose.
Note: At least we keep it trivial. Usually, you'd have to factor in things like what apps are running on your benchmarking machine, cold start vs. warm start, averaging timings over
nruns, and so on. However, we aren't really going for absolute timing values here, but merely compare relative improvements after code changes. This simplistic approach is good enough for that. Also, use a proper profiler, like Superluminal.
The command line demo app called 03_clear_profiling.c tests how fast r96_clear() and r96_clear_with_color() are respectively:
#include <MiniFB.h>
#include <stdio.h>
#include "r96/r96.h"

int main(void) {
	const int num_iterations = 200000;
	r96_image image;
	r96_image_init(&image, 320, 240);

	struct mfb_timer *timer = mfb_timer_create();
	mfb_timer_reset(timer);
	for(int i = 0; i < num_iterations; i++)
		r96_clear(&image);
	printf("r96_clear()                 %f secs\n", mfb_timer_delta(timer));

	mfb_timer_reset(timer);
	for(int i = 0; i < num_iterations; i++)
		r96_clear_with_color(&image, 0x0);
	printf("r96_clear_with_color()      %f secs\n", mfb_timer_delta(timer));

    r96_image_dispose(&image);
	return 0;
}
We create an image with 320x200 pixels and a timer. As a base-line, we measure how long it takes to clear the image 200000 times using r96_clear().
Then we measure how long it takes to do the same with r96_clear_with_color().
We always profile our code using an optimized release build. Here's what I get on my machine:
r96_clear()                 0.573491 secs
r96_clear_with_color()      4.833749 secs
That's absolutely not great! We assumed that manually looping through and setting the pixels is a bit slower than memset(). But 8.5x times slower? What is going on here?
Just looking at the code of r96_clear_with_color() doesn't really give us any hints how to improve it, so let's look at the (manually annotated) assembly code the compiler (in this case Clang targeting x86_64 on Linux) spits out for the function next to the original C code.
Note: while you can get the assembly output straight from your compiler, I tend to use the Godbolt Compiler Explorer, an online C/C++ compiler and disassembler. Enter C/C++ code in the left side editor and you'll see the assembly output generated by the chosen compiler + flags combination on the right side. You can even share your sketches, so others can help improve things easily, without needing to set up a build environment.
void r96_clear_with_color(r96_image *image, uint32_t color) {
	uint32_t *pixels = image->pixels;
	for (int i = 0; i < image->width * image->height; i++)
		pixels[i] = color;
}
r96_clear_with_color: # rdi = image, esi = color
mov eax, dword ptr [rdi + 4] # eax = image->width
imul eax, dword ptr [rdi] # eax = image->height * image->width
test eax, eax # eax == 0?
jle .LBB1_3 # yes, exit
mov r8, qword ptr [rdi + 8] # r8 = pixels = image->pixels
xor ecx, ecx # ecx = i = 0
.LBB1_2:
mov dword ptr [r8 + 4*rcx], esi # pixels[i] = color
inc rcx # i++
movsxd rdx, dword ptr [rdi] # rdx = image->width
movsxd rax, dword ptr [rdi + 4] # rax = image->height
imul rax, rdx # rax = image->width * image->height
cmp rcx, rax # i == image->width * image->height?
jl .LBB1_2 # no, next pixel
.LBB1_3:
retimage is passed to the function in rdi, the color is passed to the function in rsi.
Lines 2-5 multiply image->height ([rdi + 4]) by image->width ([rdi]), then check if the result is zero. If that's the case, we jump to .LBB1_3 and exit the function. This is an early rejection test.
If the initial check passes, then image->pixels is loaded into the local variable pixels (r8) in line 6. In line 7, i (ecx) is set to zero. We are ready to iterate.
In line 9, we set pixels[i] ([r8 + 4*rcx]) to the color (esi). Then we increment i (rcx) in line 10.
In line 11 we load image->width ([rdi]) into rdx, followed by loading image->height ([rdi + 4]) into rax in line 12, and multiply them in line 13. The result ends up in rax.
rax is then compared to i (rcx). If it is less than image->width * image->height (rax), we jump back to .LBB1_2 and write the next pixel, otherwise we fall through and exit the function.
Did you notice the problem?
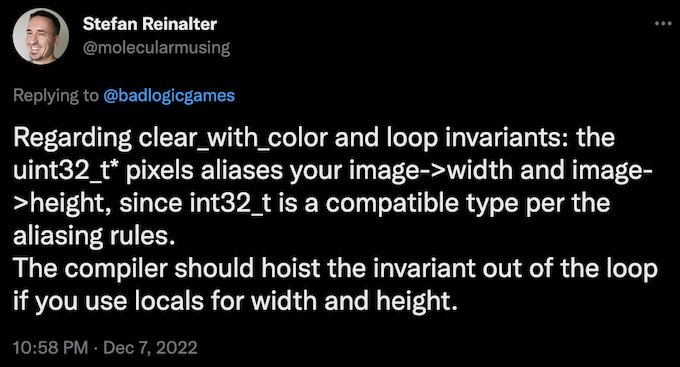
Our loop condition i < image->width * image->height has been compiled to some rather sub-optimal machine code. Instead of calculating image->width * image->height once, it is calculated for every loop iteration! Not only does this mean the width and height fields of the image are fetched from memory every iteration, we also have an integer multiplication per iteration. That's not great! Here's what Stefan of Live++ fame has to say on the bird site on why the compiler is incapable of hoisting the loop invariant out of the loop.
Let's fix this by manually precalculating image->width * image->height, thereby helping the compiler out a little:
void r96_clear_with_color(r96_image *image, uint32_t color) {
	uint32_t *pixels = image->pixels;
	for (int i = 0, n = image->width * image->height; i < n; i++)
		pixels[i] = color;
}
Before looking at the assembly code, let's run this and see if we improved things:
r96_clear()                 0.633761 secs
r96_clear_with_color()      0.761754 secs
Much better. We are now in the same ballpark as the memset() based r96_clear(). What did the compiler do? Hold on to your butts:
r96_clear_with_color:                   # @r96_clear_with_color
        mov     ecx, dword ptr [rdi + 4]
        imul    ecx, dword ptr [rdi]
        test    ecx, ecx
        jle     .LBB1_12
        mov     rax, qword ptr [rdi + 8]
        mov     r9d, ecx
        cmp     ecx, 8
        jae     .LBB1_3
        xor     edx, edx
        jmp     .LBB1_11
.LBB1_3:
        mov     edx, r9d
        and     edx, -8
        movd    xmm0, esi
        pshufd  xmm0, xmm0, 0                   # xmm0 = xmm0[0,0,0,0]
        lea     rcx, [rdx - 8]
        mov     rdi, rcx
        shr     rdi, 3
        inc     rdi
        mov     r8d, edi
        and     r8d, 3
        cmp     rcx, 24
        jae     .LBB1_5
        xor     ecx, ecx
        jmp     .LBB1_7
.LBB1_5:
        and     rdi, -4
        xor     ecx, ecx
.LBB1_6:                                # =>This Inner Loop Header: Depth=1
        movdqu  xmmword ptr [rax + 4*rcx], xmm0
        movdqu  xmmword ptr [rax + 4*rcx + 16], xmm0
        movdqu  xmmword ptr [rax + 4*rcx + 32], xmm0
        movdqu  xmmword ptr [rax + 4*rcx + 48], xmm0
        movdqu  xmmword ptr [rax + 4*rcx + 64], xmm0
        movdqu  xmmword ptr [rax + 4*rcx + 80], xmm0
        movdqu  xmmword ptr [rax + 4*rcx + 96], xmm0
        movdqu  xmmword ptr [rax + 4*rcx + 112], xmm0
        add     rcx, 32
        add     rdi, -4
        jne     .LBB1_6
.LBB1_7:
        test    r8, r8
        je      .LBB1_10
        lea     rcx, [rax + 4*rcx]
        add     rcx, 16
        shl     r8, 5
        xor     edi, edi
.LBB1_9:                                # =>This Inner Loop Header: Depth=1
        movdqu  xmmword ptr [rcx + rdi - 16], xmm0
        movdqu  xmmword ptr [rcx + rdi], xmm0
        add     rdi, 32
        cmp     r8, rdi
        jne     .LBB1_9
.LBB1_10:
        cmp     rdx, r9
        je      .LBB1_12
.LBB1_11:                               # =>This Inner Loop Header: Depth=1
        mov     dword ptr [rax + 4*rdx], esi
        inc     rdx
        cmp     r9, rdx
        jne     .LBB1_11
.LBB1_12:
        ret
The compiler basically generated a version of a highly optimized memset() implementation specifically for our setup at hand. We could spend an hour dissecting it to precisely understand what's going on. But why question the compiler's wisdom? The take away:
Always precalculate as much as you can for your inner loops, including values used in your loop condition. The compiler can not always figure out loop invariants.
Drawing horizontal lines
With our housekeeping out of the way, it's time to get back to the actual goal of this post: drawing rectangles. But first, we need to learn how to draw horizontal lines. Wax on, wax off.
We define a horizontal line by a start point (x1, y) and an end point (x2, y), where x1 <= x2. Since it's a horizontal line, the y-coordinate is the same for both points. The line covers all the pixels including and in-between the start and end point.
Note: Translating a "mathematical" representation of something to pixels on a raster is what's actually called "rasterization". An infinitely precise thing is boiled down to and approximated by a bunch of colored squares in a raster.
A few example horizontal lines on a small 16x12 raster.
Some of the lines are "problematic", as they aren't entirely inside the raster. Before we can draw their pixels, we need to clip them!
The two blue lines have y-coordinates y < 0 and y > height - 1. Any horizontal line with a y-coordinate outside the raster can be entirely ignored.
The two red lines share a similar fate. They are outside the raster on the x-axis. Any horizontal line with either x2 < 0 or x1 > width - 1 can be discarded.
The two green lines are all good. Both their endpoints are inside the raster.
The pink lines are ... weird. They are partially inside the raster. How do we deal with them? We clip them! Meaning, we calculate new start and end points for the part of the line that is inside the raster.
For the left point, we snap x1 to 0. For the right point, we snap x2 to width - 1. Here are all the pixels we actually have to draw.
Once we've clipped a line, we just need to draw all the pixels between and including its start and end points.
Demo app: horizontal lines, naive version
Let's add a new demo app called 04_hline.c:
#include <MiniFB.h>
#include <stdio.h>
#include "r96/r96.h"

void hline(r96_image *image, int32_t x1, int32_t x2, int32_t y, uint32_t color) {
	if (x1 > x2) {
		int32_t tmp = x2;
		x2 = x1;
		x1 = tmp;
	}

	if (x1 >= image->width) return;
	if (x2 < 0) return;
	if (y < 0) return;
	if (y >= image->height) return;

	if (x1 < 0) x1 = 0;
	if (x2 >= image->width) x2 = image->width - 1;

	for (int32_t x = x1; x <= x2; x++)
		r96_set_pixel(image, x, y, color);
}

int main(void) {
	r96_image image;
	r96_image_init(&image, 320, 240);
	struct mfb_window *window = mfb_open("04_hline", image.width * 2, image.height * 2);
	struct mfb_timer *timer = mfb_timer_create();
	do {
		srand(0);
		mfb_timer_reset(timer);
		for (int i = 0; i < 200000; i++) {
			uint32_t color = R96_ARGB(255, rand() % 255, rand() % 255, rand() % 255);
			hline(&image, rand() % image.width, rand() % image.width, rand() % image.height, color);
		}
		printf("Took: %f\n", mfb_timer_delta(timer));

		if (mfb_update_ex(window, image.pixels, image.width, image.height) < 0) break;
	} while (mfb_wait_sync(window));
	r96_image_dispose(&image);
	return 0;
}
The hline() function first ensures that x1 < x2 in lines 6-10. This is a precondition we need to enforce, otherwise our clipping rules won't work.
In lines 12-15, we reject all lines that are entirely outside the image, applying the rules we established above for the blue and red lines.
Lines that are partially inside the image get clipped in lines 17-18.
With all the clipping out of the way, we know that the start and end point (and the pixels between them) are entirely within the bounds of the image.
We finish the function by drawing all the pixels at and in between the start and end point in lines 20-21 using r96_set_pixel().
In the main() function, we draw 200000 lines at random positions and measure how long it takes to do so. The call to srand() sets the seed for the function rand(). We'll always get the same sequence of "random" numbers that way.
Note: If we measure something to later improve it, we have to ensure that what we measured is the same each time, even if it involves "fake" randomness. If we didn't "fix" the randomness in this case, we may draw a different number of pixels each run, which would skew the results.
Here's the output from a release build on my machine:
Took: 0.032682
Took: 0.033261
Took: 0.032935
Took: 0.032707
Not a scientific benchmark, but good enough as a ballpark estimate. This time, we have no base-line to compare against. So, let's take this version of hline() and see if we can improve upon it!
Demo app: horizontal lines, optimized
Looking real hard at the hline() implementation, the only thing that stands out is the call to r96_set_pixel(). What's that do again?
void r96_set_pixel(r96_image *image, int32_t x, int32_t y, uint32_t color) {
	if (x < 0 || x >= image->width || y < 0 || y >= image->height) return;
	image->pixels[x + y * image->width] = color;
}
Oh right, it actually does clipping and it calculates the address of the pixel, which adds an addition and multiplication to our inner loop in hline(). That's not good!
The hline() function already ensures that all pixels we are drawing are inside the raster. The extra clipping in r96_set_pixel() is thus unnecessary.
And once we know the address of the start pixel at x1, y, the address of each subsequent pixel on the line can be calculated by continuously incrementing the address by 1. Remember: pre-calculate all loop invariants and do as little work in inner loops as possible!
Here's the optimized hline() version from 05_hline_opt.c:
void hline(r96_image *image, int32_t x1, int32_t x2, int32_t y, uint32_t color) {
	if (x1 > x2) {
		int32_t tmp = x2;
		x2 = x1;
		x1 = tmp;
	}

	if (x1 >= image->width) return;
	if (x2 < 0) return;
	if (y < 0) return;
	if (y >= image->height) return;

	if (x1 < 0) x1 = 0;
	if (x2 >= image->width) x2 = image->width - 1;

	uint32_t *pixels = image->pixels + y * image->width + x1;
	int32_t num_pixels = x2 - x1 + 1;
	while(num_pixels--) {
		*pixels++ = color;
	}
}
We keep all the clipping from before, but are a bit smarter regarding our inner loop.
We precalculate the address of the pixel covering our start point at (x1, y) in line 16. We also precalculate the number of pixels we are going draw in line 17.
The inner loop then counts down the number of pixels we've drawn so far, while assigning the color to the current pixel and incrementing the address by one. Pretty tight. On my machine, I get these timings:
Took: 0.011275
Took: 0.011216
Took: 0.011437
Took: 0.011545
A nice improvement! Let's have some live lines to celebrate (click to start)
Note:
hline()is as good as it gets, so it's been added asr96_hline()tor96.c. Going forward, we'll develop other rendering functions in the same way: build a demo app with a naive implementation, improve performance, and finally add it to ther96library once it's good enough.
Drawing rectangles
We define a rectangle by its top left corner point (x1, y1) and its bottom right corner point (x2, y2), where x1 <= x2 and y1 <= y2. The rectangle covers all pixels (x, y), where x1 <= x <= x2 and y1 <= y <= y2.
Alternatively, we can define a rectangle by its top left corner point (x1, y1) and a positive width and height given in pixels. We can derive (x2, y2) from this information, as x2 = x1 + width - 1 and y2 = y1 + height - 1.
Note: And there it is, again. Our good friend
-1. Can you figure out why it's needed to calculatex2andy2fromx1,y1,width, andheight?
As with horizontal lines, it pays off to first check out the clipping cases:
This looks familiar! Much of the clipping we did for horizontal lines applies to rectangles as well. All we need to do is take y2 into account. Let's go through the cases.
The two blue rectangles are above the top edge of the raster (y2 < 0) and below the bottom edge of the raster (y1 > height - 1). Any rectangles that fulfill either criteria are outside the raster and don't have to be drawn.
The two red rectangles have the same problem, but relative to the left and right raster edges. Any rectangle with either x2 < 0 or x1 > width - 1 can ignored. This is the exact same case as we had for horizontal lines.
The pink rectangles are the baddies again. Just like with their pink horizontal line counter parts, we'll need to clip them. If x1 < 0 we snap it to 0. If y1 < 0 we also snap it to 0. If x2 > width - 1, we snap it to width - 1. Similarly, if y2 > height - 1, we snap it to height - 1.
If a rectangle passes all the above tests, or has been clipped, then it is firmly inside the raster and can be drawn as is, like the green rectangle. Here's what we'll render for the above scene after clipping:
Knowing that a rectangle's corner points (x1, y1) and (x2, y2) are fully inside the raster after clipping makes rendering the rectangle trivial.
For each y-coordinate y between and including y1 and y2, we render a horizontal line from (x1,y) to (x2,y). And we already got a function for rendering horizontal lines!
Demo app: drawing rectangles, naive version
Time for another demo app called 06_rect.c:
#include <MiniFB.h>
#include <stdio.h>
#include "r96/r96.h"

void rect(r96_image *image, int32_t x1, int32_t y1, int32_t width, int32_t height, uint32_t color) {
	if (width <= 0) return;
	if (height <= 0) return;

	int32_t x2 = x1 + width - 1;
	int32_t y2 = y1 + height - 1;

	if (x1 >= image->width) return;
	if (x2 < 0) return;
	if (y1 >= image->height) return;
	if (y2 < 0) return;

	if (x1 < 0) x1 = 0;
	if (y1 < 0) y1 = 0;
	if (x2 >= image->width) x2 = image->width - 1;
	if (y2 >= image->height) y2 = image->height - 1;

	for (int y = y1; y <= y2; y++)
		r96_hline(image, x1, x2, y, color);
}

int main(void) {
	r96_image image;
	r96_image_init(&image, 320, 240);
	struct mfb_window *window = mfb_open("06_rect", image.width * 2, image.height * 2);
	struct mfb_timer *timer = mfb_timer_create();
	do {
		srand(0);
		mfb_timer_reset(timer);
		for (int i = 0; i < 200000; i++) {
			uint32_t color = R96_ARGB(255, rand() % 255, rand() % 255, rand() % 255);
			rect(&image, rand() % image.width, rand() % image.width, rand() % (image.width / 5), rand() % (image.height / 5), color);
		}
		printf("Took: %f\n", mfb_timer_delta(timer));

		if (mfb_update_ex(window, image.pixels, image.width, image.height) < 0) break;
	} while (mfb_wait_sync(window));
	r96_image_dispose(&image);
	return 0;
}
It's usually more comfortable to render a rectangle given its top-left corner point (x1, y1) and a width and height. That's what the rect() function expects.
It does a sanity check on the provided width and height: if they are <= 0 we exit early. Drawing a zero width or zero height rectangle makes no sense.
Next, we calculate x2 and y2, as it's easier to do clipping on the corner point representation of a rectangle.
We then run through all the clipping cases we discussed above and end up with our final (x1, y1) and (x2, y2 corner points which we know are within the raster if we made it that far.
The for loop then iterates through all the y-coordinates the rectangle covers, and draws a horizontal line for each (x1, y) and (x2, y) using r96_hline().
The main() function is unsurprising. We draw 200000 semi-random rectangles and time how long that takes. Have a demo!
Here are the timings on my machine for a release build:
Took: 0.029729
Took: 0.029665
Took: 0.029447
Took: 0.029449
Can we make this faster?
Inlining and link time optimizations
Just by looking at the code, we see that invoking r96_hline() isn't ideal. It performs clipping on the inputs, which we know are within the raster. Superfluous work. But let's ignore that for now, as the bulk of the work is done when setting the pixels in a row.
Another issue: unless the compiler has inlined the call to r96_hline() into rect(), we also incur a function call for each row of the rectangle we draw. Since r96_hline() lives in r96.c and we are calling it from main.c the compiler will be unable to inline the function, as those are 2 separate compilation units.
We can remedy this by moving the definition of r96_hline() from r96.c into r96.h and prefix the function with the keyword inline. Then I get:
Took: 0.027828
Took: 0.027713
Took: 0.027813
Took: 0.027851
Indeed, looking at the assembly, the call was eliminated and r96_hline() was entirely inlined into rect(). But that's not a great solution, as most compilers will manage to inline r96_hline() everywhere, which bloats executable size, or may put pressure on the register allocator, thus actually slowing down our code.
As an alternative to gunking up our header files, we can use link time optimizations as supported by Clang, GCC, and MSVC. Let's update the CMakeLists.txt file to turn that on.
...

if(CMAKE_BUILD_TYPE MATCHES Release)
    include(CheckIPOSupported)
    check_ipo_supported(RESULT result)
    if(result)
        set(CMAKE_INTERPROCEDURAL_OPTIMIZATION TRUE)
    endif()
endif()

...
This snippet checks if LTO is supported by the current compiler, and if so, enables LTO for all targets that are defined afterwards, if we are building a release build. Here are the new timings with LTO on:
Took: 0.025003
Took: 0.025114
Took: 0.025030
Took: 0.024995
Not bad! The reason this performs better than the inlining done above is that basically all the code is inlined into main() directly. It was even able to remove some of the superfluous clipping checks of the inlined r96_hline()! Let's keep LTO on by default for all targets.
We can't always rely on LTO to do such a good job though. Let's fix this by getting rid of the call to r96_hline() ourselves.
Demo app: rectangles, optimized
Here's what I came up with in the new demo app 07_rect_opt.c:
void rect_opt(r96_image *image, int32_t x1, int32_t y1, int32_t width, int32_t height, uint32_t color) {
	if (width <= 0) return;
	if (height <= 0) return;

	int32_t x2 = x1 + width - 1;
	int32_t y2 = y1 + height - 1;

	if (x1 >= image->width) return;
	if (x2 < 0) return;
	if (y1 >= image->height) return;
	if (y2 < 0) return;

	if (x1 < 0) x1 = 0;
	if (y1 < 0) y1 = 0;
	if (x2 >= image->width) x2 = image->width - 1;
	if (y2 >= image->height) y2 = image->height - 1;

	int32_t clipped_width = x2 - x1 + 1;
	int32_t next_row = image->width - clipped_width;
	uint32_t *pixel = image->pixels + y1 * image->width + x1;
	for (int y = y1; y <= y2; y++) {
		for (int i = 0; i < clipped_width; i++) {
			*pixel++ = color;
		}
		pixel += next_row;
	}
}
All the clipping code stays the same, we only replace our call to r96_hline() with something that's a bit less work per row.
In line 18, we calculate the clipped width. We need that in the next line to calculate next_row, which we'll use to calculate the address of the first pixel in the next row, once we are done setting all the pixels in the current row (line 26).
We also precalculate the address of the first pixel we are going to set the color of. It's the pixel of the top-left corner of the rectangle.
Then we start to loop through all rows of the rectangle, from y1 to y2. For each row, we set each of its pixels to the color. That's one addition (i++), one memory store (*pixel = color) and one increment (pixel++) per pixel in a row. Pretty OK.
Once we've completed rendering the current row, we calculate the address of the first pixel of the next row by adding next_row to pixel.
I've omitted the main() function above, as it is essentially the same as the last demo app's main().
On my machine, I get the following timings without LTO:
Took: 0.023962
Took: 0.023914
Took: 0.023863
Took: 0.023713
With LTO:
Took: 0.024675
Took: 0.024555
Took: 0.024480
Took: 0.024596
Pretty much a toss up, though it seems the non-LTO version has a slight edge. Compared to the first naive implementation, we shaved off a bit of overhead by removing the function call and clipping. But since those are per row costs, we don't gain as much, as the bulk of the work is done per pixel.
It is nice, however, that we can match LTO performance with just a simple modification of the code that will alsow work with compilers without LTO support!
Since this is as good as it gets, rect_opt() has been promoted r96.c and shall henceforth be known as r96_rect().
Again, Mario, REALLY?
Welp, I guess I can't write short blog posts. But we learned a lot again! I'm undecided what we'll look into next time. Either drawing lines, or loading and drawing images. It's going to be fun none the less.